


 New Code Sent!

30-inch vs. 36-inch cooktop: is it worth the switch?
Renovating your cooktop space can transform the way your family enjoys cooking and spends time together in the kitchen. This guide will help you discover the important differences between 30-inch and 36-inch cooktops, what factors should influence your decision, and determine which option can help elevate your cooking style and kitchen layout. You’ll also learn the steps to replacing a 30-inch cooktop with a 36-inch model.


30-inch vs. 36-inch cooktops: key differences
The most obvious difference when comparing 30-inch and 36-inch cooktops is the width, but this isn’t the only difference. Keep reading to learn how differing cooktop dimensions can affect functionality, ventilation and installation.
Cooktop width: 36-inch cooktops add six inches of width compared to their 30-inch counterparts, providing more cooking surface.
Ventilation requirements: Your range hood dimensions need to be at least as wide as your cooktop for optimal ventilation, meaning a 36-inch cooktop requires a larger hood for proper coverage.
Available burners: Both cooktop sizes have a fifth burner, but the larger surface area of a 36-inch cooktop can better accommodate extra burners to ensure the cooktop surface doesn’t become cramped.
Installation requirements: Cooktops fit into countertop cutouts, which must be slightly smaller than the cooktop, so the cooktop surface can extend past the cutout and onto the countertop. For installation, this typically means that larger cooktops need larger cutouts.

Key considerations when choosing between a 30-inch and 36-inch cooktop
Ultimately, deciding between a 30-inch and 36-inch cooktop comes down to your taste, the layout of your space, cooking habits, budget, desired cooktop fuel type, and ventilation requirements.
Let’s review five key considerations you should make during your search.
Kitchen layout: Unless a remodeling is in the works, your current cabinet cutout size should dictate whether you choose a 30-inch or 36-inch cooktop. Smaller cooktops work well for compact kitchens that lack ample countertop space for food prep, while 36-inch models are often ideal for kitchens with room to spare. You should keep a minimum of 8 inches of counter space on either side of the cooktop for food prep.
Cooktop type: Installation and ventilation needs might vary depending on the fuel type. For example, gas cooktops often need a slightly larger cutout than electric or induction models.
Cooking routines: A 36-inch cooktop makes cooking for a larger family easier, as it provides more room to create multiple dishes or large batches. If you tend to prep smaller portions or cook simple meals, a 30-inch cooktop may be enough to get the job done. Certain 30-inch cooktops offer a fifth burner, such as this model from Whirlpool brand, but you may encounter less room to use large cookware.
Range hood size: Your range hood must match the width of your cooktop to adequately capture the odours, smoke and grease that occur while cooking. 30-inch range hoods are the most common range hood size, yet 36-inch options, like these Whirlpool® models, can help provide the necessary ventilation for larger cooktops.
- Budget: 36-inch cooktops are often slightly more expensive than 30-inch cooktops. Also, consider any renovations needed, in addition to the cost of the cooktop itself and possibly a new range hood. Including these factors in your decision can help you determine which size is right for you, your household and your budget.


Why choose a 30-inch cooktop?
30-inch cooktops are often an ideal fit for tighter spaces, offering many of the same features as their larger 36-inch counterpart. 30-inch cooktops usually come at a less expensive price point than 36-inch models. If you don’t often cook elaborate meals or host large dinner parties, the additional space may not be necessary.


Need help choosing a new cooktop?
Shop Whirlpool® 30-inch Cooktops
Whirlpool® 30-Inch Cooktops are ideal for smaller spaces without sacrificing performance. The SpeedHeat™ Burner on select models produces the high heat needed to sear meat and boil water quickly, while a fifth burner on select cooktops lets you pick the right burner for each dish.

Why buy a 36-inch cooktop?
A 36-inch cooktop provides additional space and sometimes five or six burners, instead of four. It’s a strong choice for larger kitchens, especially if you typically create large family meals or host guests. 36-inch cooktops offer flexibility to cook multiple dishes and sides with more ease.


Whirlpool® Induction Cooktops
Get responsive temperature control
Induction Cooktops from Whirlpool brand offer fast cooking and responsive temperatures, paired with a sleek, easy-to-clean surface
Shop Whirlpool® 36-inch Cooktops
Available in gas and electric models, Whirlpool® 36-Inch Cooktops provide the room to make more for your family. The FlexHeat™ Triple Radiant Element on select models is like having three elements in one. A 6-inch inner ring works well for smaller pots and pans, while 9-inch and 12-inch outer rings can heat larger cookware. And with 36-inch range hoods, available in a variety of configurations, you get the venting power to match.
How to switch from a 30-inch to a 36-inch cooktop
Upgrading to a 36-inch cooktop is possible for any kitchen with adequate space. You should still be aware that some renovations to your cabinetry may be required.
Use this step-by-step overview for installing a new cooktop.
Step 1: Measure cabinetry
If you’re looking to replace your cooktop with a larger model, the first step is to ensure your cabinets can accommodate the additional width. If the cabinet holding your current cooktop is 32 inches wide or less, plan to remove some cabinets to make room.
Step 2: Plan for ventilation
Before installing a new cooktop, measure your range hood or over-the-range microwave’s width to confirm it’s at least 36 inches wide. If not, you will need to plan for a replacement.

Step 3: Disconnect the fuel source
You must always disconnect the fuel source prior to removal. If you’re reconnecting a cooktop with the same type of fuel source, photograph or label the wiring to make reconnection easier.
Step 4: Shut off the power
Shut off the electricity at the fuse box and then double-check that it's off with a circuit tester before handling the cooktop.
Step 5: Remove the old cooktop
Confirm you have adequate space to work with by removing any surrounding cabinet drawers or doors. You will need to detach all of the cooktop’s removable parts, unscrew the brackets holding it in place, and then, with help, remove the cooktop.
Step 6: Measure the countertop opening
Once the cooktop is removed, measure the empty countertop cutout. Cooktops typically need 30 inches and 1-2 feet of clearance per side, but requirements might vary by model, so review your new product manual for specifics. Always measure your space, allowing for ½ inch to 1 inch on each side to accommodate the overhanging lip, and ensuring there’s plenty of space below for the burners.

Step 7: Prepare the new cooktop
Take your new cooktop out of its packaging and remove all protective materials. Set aside loose parts until you’ve installed the cooktop.

Step 8: Install clips and brackets
Clips attach to your cooktop and snap into brackets, holding it in place on the countertop cutout. You can secure these brackets with adhesives or screws. Review your product manual for specific installation instructions.
Step 9: Lower the cooktop into opening
This step might require you to elicit some help. With another person, lower the cooktop into place and then align the clips with the countertop brackets. Finally, push down to secure it in place.

Step 10: Connect the fuel source
How you complete this step depends on whether you're connecting a gas or electric cooktop. It’s important to follow your product manual for specific instructions. Don’t be shy about hiring professional help if you're uncomfortable with this step or unsure how to do it.

Step 11: Install trim
Lastly, tighten the screws on the clips and brackets to achieve a secure hold. You need to caulk the area if you're adding trim. Consult your product manual for information on how to attach the knobs, grates and burner covers.
Explore gas, electric and induction cooktops from Whirlpool brand
Whirlpool® Cooktops are designed with the features to help you move through meal prep and cleanup with ease. On select gas cooktops, the FlexHeat™ Burner uses two rows of flames to provide the evenly distributed high heat needed for rapid boiling and searing or lower temperatures to handle more delicate dishes. And with induction technology on select models, you can clean up quickly as the cooktop surrounding the elements stays cool, eliminating baked-on messes.
Discover more from Whirlpool brand
-
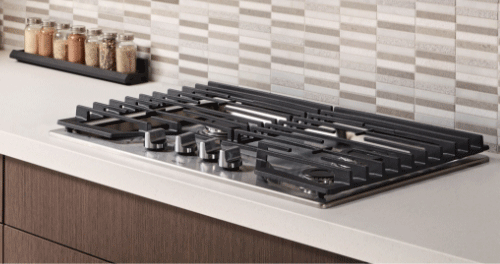 The Dimensions of Cooktops Are you looking to upgrade your kitchen with a cooktop? Knowing their measurements is crucial. Our guide can help you get started.
 -
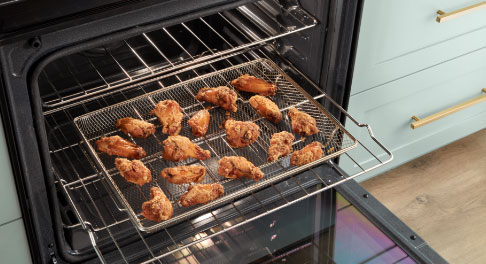 Unlocking the Full Potential of Your Air Fryer: 7 Helpful Tips Discover tips to maximize your air fryer’s potential, from perfecting cooking techniques to understanding the best and worst foods to use, all in one guide.
 -
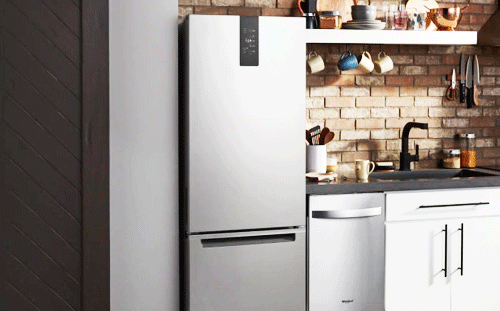 How To Find The Right Apartment-Sized Refrigerator Trying to find a fridge to fit your small space? Learn what an apartment-sized refrigerator is, where one can fit and what features to look for as you shop.